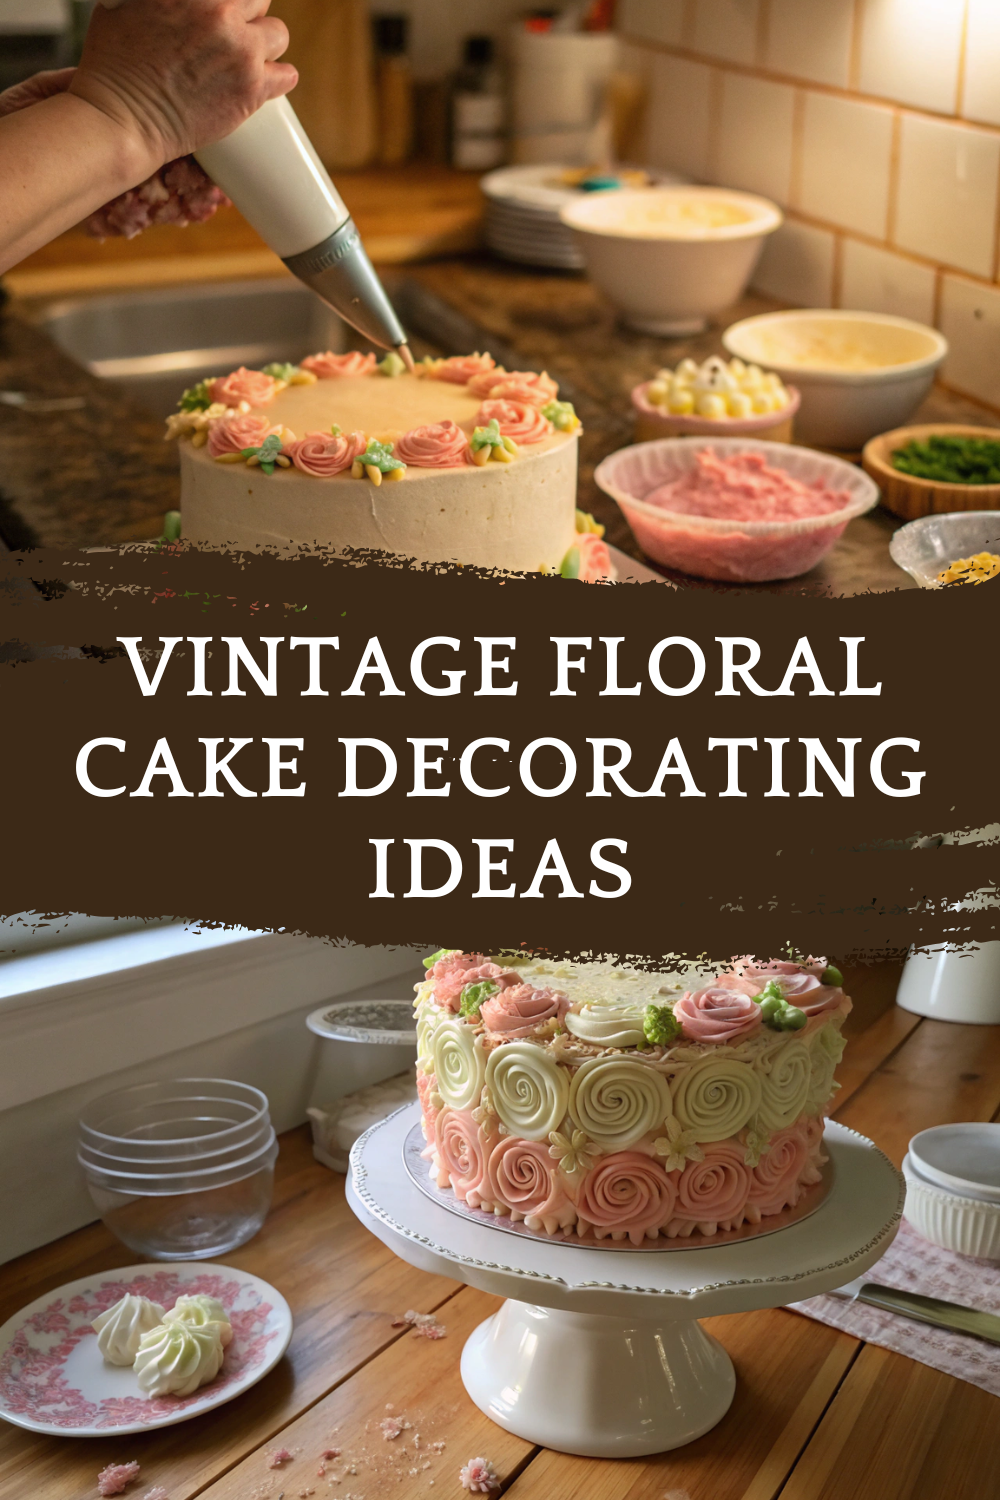
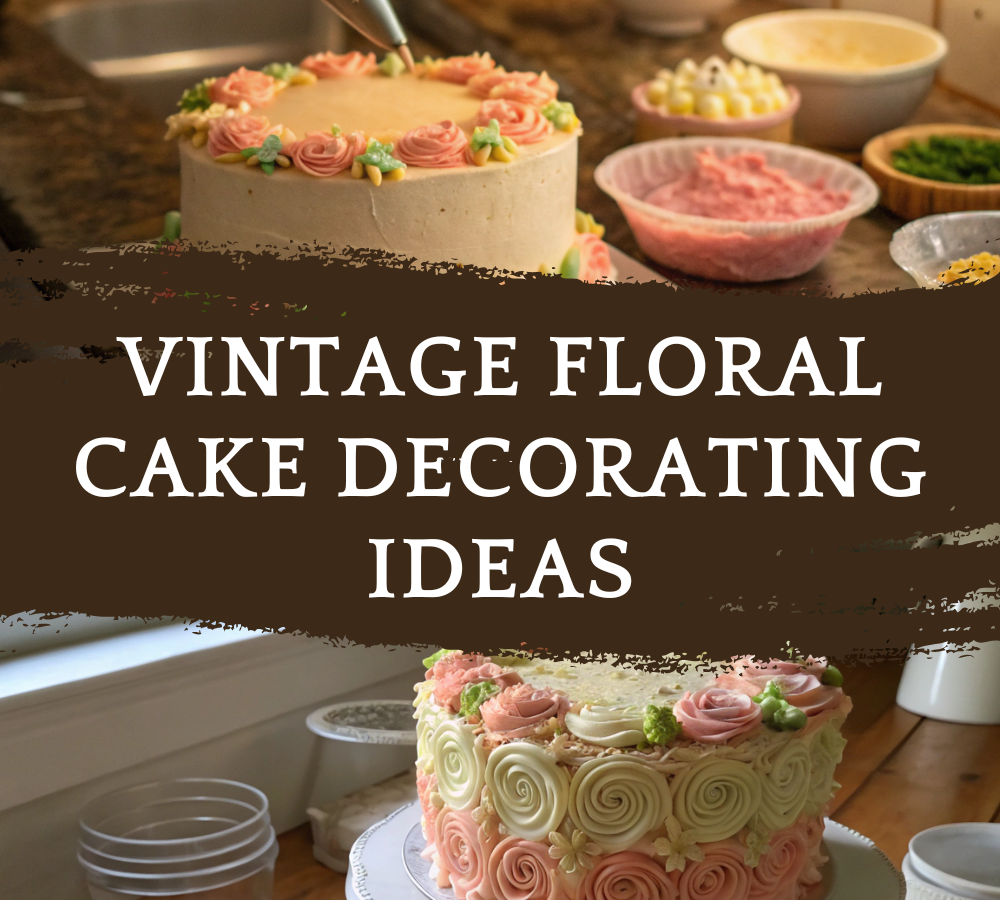
Vintage Floral Cake
I made my first vintage-style cake after falling down a late-night rabbit hole of old bakery photos online. You know the ones — over-the-top piping, soft pastel colors, tiny frosting borders everywhere. I was convinced it would either turn out beautiful or look like a birthday cake from a grocery store clearance table.
Honestly, the first attempt was rough. My frosting was too soft, the piping drooped, and one side looked noticeably lopsided in every photo. But after a few tries and way too much buttercream on my kitchen counters, this version finally became the cake I bring out for birthdays, showers, and those dinners where I want people to think I worked harder than I actually did.
Why This Recipe Works
Here’s the thing with vintage floral cakes: the decorating looks intimidating, but the actual cake itself needs to stay simple and stable. What I figured out is that a soft vanilla butter cake with sturdy buttercream works way better than overly delicate sponge cakes here.
The chilled frosting also makes a huge difference. If the buttercream gets too warm, all those little borders and flowers start sliding around, which I learned during one very stressful summer birthday party.
Ingredient Notes
I use salted butter in the cake because it balances the sweetness better, especially once all the frosting goes on.
For the buttercream, unsalted butter gives you more control over flavor. And yes, real butter matters here. Shortening-based frosting pipes easily, but I personally don’t love the texture.
Gel food coloring works best for the pastel shades because liquid coloring can thin the frosting too much.
And don’t skip cake flour if you can help it. The crumb stays softer and more bakery-style.
How to Make It
Start by greasing and lining your cake pans because nothing ruins decorating motivation faster than a cake sticking to the pan.
Cream the butter and sugar together until it looks pale and fluffy. It takes longer than people think — usually a few full minutes. Add the eggs one at a time, then mix in vanilla.
In a separate bowl, whisk together the cake flour, baking powder, and salt. Alternate adding the dry ingredients and milk into the batter until everything is smooth. Try not to overmix once the flour goes in or the cake texture gets heavier.
Divide the batter evenly into pans and bake until the tops spring back lightly when touched. Let the cakes cool completely before frosting. Completely. I ignored this once and watched buttercream slowly slide off the sides like melted ice cream.
For the buttercream, beat the butter until creamy, then slowly add powdered sugar, vanilla, and a splash of cream until fluffy. Set aside small portions for pastel colors if you want floral piping details.
Once the cake layers are stacked and crumb coated, chill the whole cake for at least 20 minutes before decorating. This part makes piping so much easier.
Use piping bags with star tips and small round tips to create borders, shells, swirls, and little flowers around the cake. The beauty of vintage cakes is that slightly uneven piping actually makes them feel more homemade and classic.
Things I Learned the Hard Way
Cold cake layers are much easier to decorate than room-temperature ones.
Also, don’t overfill piping bags. I did that the first time and frosting exploded out the top onto my shirt halfway through decorating.
If your buttercream suddenly looks too soft, stick it in the fridge for 10 minutes instead of adding more sugar immediately.
And take photos quickly if your kitchen is warm. Detailed buttercream piping starts softening faster than you’d expect under bright lights.
Storage & Serving Suggestions
This cake keeps well covered in the fridge for about 4 days. I usually let slices sit out for 20 minutes before serving so the buttercream softens slightly.
It’s perfect for birthdays, bridal showers, tea parties, or honestly just weekends when you feel like making something extra pretty for no real reason.